Getting Started With FreeForm Auction and Template Builder

Table of Contents
Quick Start - Installation (none), Building a Presentation, Previewing, Saving, Transferring to eBay
Long Version - Purpose, Suitability, Functional Overview, System Requirements, Image Hosting Requirements
What is Image Hosting? - To show pictures in the body of auction descriptions requires use of Internet hosting
Picture URLs and Uploading - A description of what a URL is and common methods used to copy pictures from your computer to an Internet host
Copy and Paste - A very useful technique for transferring information from one place to another
Prepping Photos for use within the body of descriptions on eBay - Techniques to optimize your photos for use in eBay auction or store item descriptions
EAPH Help & Information Center - Includes a general descrition of the relationships between eBay, a third party hosting service, and FreeForm along with suggestions to improve your sales on eBay
If you've arrived here by clicking a link from within the FreeForm Builder page you may close this window to return.  If you arrived here from elsewhere then you will always be able to find FreeForm from the home page at robshelp.com

Quick Start Table of Contents
Installation:  There is nothing to download or install.  FreeForm runs through your Internet browser.  Maximum functionality will be obtained via Microsoft Internet Explorer 5.5 (or higher version) operating on Windows 95 (or newer operating system).  Some features may or may not function with other browsers or operating systems -- the only way to know for sure is to try.  Absolutely no obligation or even nagging will result from giving FreeForm a try.

Building a presentation:  Using FreeForm begins in the "Builder" page.  At the top of the Builder page are various buttons and links (read the text provided with them).  Below the buttons and links is the Builder itself starting with the "Global Features Input Area".  Besides the Global Features there are 9 different types of Input Areas that each define a different type of content for your presentation.  You may insert any type of Input Area anywhere you want to by clicking in the gray strip that appears beneath each Input Area in the Builder.  You may remove any Input Area by clicking on the "Remove" link in each Input Area.

By inserting and removing Input Areas you have complete control over the sequence of your presentation such as Picture, Text, Picture, Text -- any combination you desire.  What you put into each Input Area is translated by FreeForm into HTML and, when you click on any of the "Preview" buttons, your creation is displayed on the Preview Page.

Building a description consists of:
  1. Inserting Input Areas where you want them in the Builder
  2. Removing Input Areas you don't need
  3. Experimenting with different entries and settings in each of the Input Areas remaining
All the while, test as you build by going back and forth to the Preview page.

Previewing: FreeForm is designed to load the Preview page into a new window so that returning to the Builder is quick and easy.  At the top of the Preview page there are instructions (read them) followed by the display of your presentation.  Beneath the display of your presentation there are various buttons and links (read the text provided with them).  There you will find the ability to save and to use your description on eBay.

Saving: Saving is done from buttons appearing in the Preview page beneath the display of your description.  Learn how to save and restore descriptions and practice that before getting too deeply into the design of your first presentation.  When working on a presentation take a moment to save it from time to time to prevent losing all your work if your Internet connection or the power to your computer sputters.

Saving consists of storing the ingregients of your presentation -- the Input Areas used, their sequence, and their contents -- into "containers" residing on either the robshelp or EAPH websites.  Once saved into a container those ingredients can then be Restored to the Builder on a future occasion.

Transferring a presentation to eBay: Behind the scenes, FreeForm translates Input Area selections and their contents into HTML "code" each time you go to the Preview page.  Getting to that HTML so you can use it on eBay is done from the buttons and links located beneath the display of your presentation on the Preview page.

To use a saved description/presentation:  First Restore it to the Builder, then go to Preview, then click on the appropriate button located beneath the display of your presentation (in the same area at which you find the Save buttons).

That's it for the quick start! If you're not familiar with the need for Internet hosting to enable the display of pictures within the body of descriptions on eBay then be sure to read about that too from the Table of Contents.

Long Version Table of Contents
Purpose - why FreeForm exists
HTML (Hyper Text Markup Language) is the programming language of the World Wide Web (AKA Internet) and is allowed by eBay for use in auction descriptions.  Use of HTML enables presentations consisting of formatted text, color, and images (graphics and pictures/photos).  Although not as complex as most computer programming languages, sufficient mastery of HTML to obtain satisfactory results on eBay requires a significant investment of time and effort.  The alternative to learning HTML is to engage the help of programs designed as tools to create the HTML.  FreeForm is such a tool with the unique distinction of being designed specifically for creation of customized HTML auction descriptions/templates for use on eBay.

Suitability - is FreeForm for you?
FreeForm will serve the purposes of those who desire the capability to include backgrounds, color, formatting, and images (photos and/or graphics) to their auction descriptions with relative ease.  Any number of photos may be embedded into an auction description created by FreeForm which makes it particularly suitable for those who require many photos to adequately present their items and/or desire a "story" format (alternating descriptive text with photos).  Every creation designed using FreeForm can be saved for use as a template for additional creations.  In spite of this ability to create templates, if you list a large number of items each week, then the flexibility provided by FreeForm may actually get in the way of your need for efficiency.  Volume eBay sellers may decide to only use FreeForm when presenting high value items and settle for fixed templates built into more comprehensive auction management tools for everything else.  FreeForm does a very good job of helping you create attractive descriptions and save them for reuse as your own custom templates but it is certainly not a speed listing service.

Functional Overview - how FreeForm works
FreeForm is an on-line (nothing to download or install) program that translates into HTML the information you provide within "Input Areas" of a special Builder form.  The form is special because you control the overall layout of your description by inserting and removing the various types of "Input Areas" available for use in that form.  During the process of creating your custom description layout a Preview is provided to show how it will ultimately appear on eBay.  Simply go back and forth from Preview making adjustments to the form and to your entries until you are completely satisfied with its appearance.  At the bottom of the Preview page you are provided with program links to save the description and/or to use the description you've created.  Saving the description consists of saving your custom form layout and all the information you've typed into that form.  Saving enables you to easily use that layout and information as a template or starting point for future creations with FreeForm.  Using the description begins with clicking on one or the other of the "Post Auction Methods" links also provided at the bottom of the Preview screen.  On the "Post Auction" pages the HTML "code" (HTML Results) FreeForm constructed for you is made available along with instructions on how to use it during the process of posting an auction.  That HTML, when transferred by you into an eBay form (where eBay accepts the description) results in your custom description appearing within an eBay auction.

At first glance the processes described above and FreeForm's Builder (form entry) page may seem intimidating.  In almost all cases, however, once a few basics are understood using the program becomes very simple and if you are not particularly adventuresome the default settings within "Input Areas" will produce attractive descriptions.

FreeForm gains it's name from the freedom provided to configure the special "Builder" form to your desires.  Using the program begins with understanding that you can insert and remove "Input Areas" as you wish and so create a custom presentation sequence.  Each Input Area includes a "Remove" link to eliminate it at that location and between each input area as you scroll down the form page is an "Insert Here" bar enabling the insertion of any Input Area into that location of the Builder form.  Most of the Input Areas are separately formattable enabling additional creativity.  Always remember that more depth of explanation is provided within the Builder form by clicking on the Help buttons and ? links provided throughout.  With that in mind, here is a brief description of how each type of Input Area may be used:
  • Global Features Input Area  Always at the top of the Builder form.  Here is where you control overall appearance and formatting defaults including text color, background wallpaper, and text font.

  • Title Input Area  A good auction title is extremely important and squeezing information into the 45 characters allowed by eBay can be a challenge!  A Title Input Area is provided as a convenience place to store the one you will use when posting the auction on eBay.  It may be set to display within the description or remain hidden.

  • Text Input Areas  A picture is worth a thousand words and a good representation in photos of the items you sell will help get bids, but first people need to find your auction and pictures are not searchable for key words!  Include text in your presentation as description to augment photos but also use your imagination and weave in words that people might use when searching for what you are selling.  To avoid boring your auction visitors with long running text you may intersperse Text Input Areas with Picture Input Areas and/or apply varied formatting to different adjacent Text Input Areas.  For example, you can create a list of features in a Text Input Area with a different formatting than other Text Input Areas containing paragraph style text.

  • Picture Input Areas  Good pictures get bids because they provide compelling evidence of quality.  By inserting Picture Input Areas into your Builder form wherever you want them you may embed as many pictures ae necessary to remove any possible doubt as to quality.  With FreeForm there are no inherent limitations to the number of pictures you may use but to include pictures within the body of a description requires third party image hosting.  eBay Picture Hosting does not provide for pictures within the body of the description nor is it possible to include pictures directly from your home computer.  Third party image hosting is explained in detail under Requirements.

  • Website Link Input Areas  HTML "HyperLinks" commonly referred to as simply "links" are what bind the World Wide Web together.  Clicking on a text or image link transports the visitor to another location on the Web.  FreeForm provides input areas to construct HTML links for you including this one designed to easily create a link to another website or to an eBay "About Me" page.  Website Link Input Areas may also be used to construct standalone "click for full size" picture (image) links.  When groupings of "click for full size" links are required use Thumbnail Link Input Areas (below) instead.
    Very Important!  eBay has policies regarding links and advertising images used within eBay auctions.  For example, if a logo or icon is used the logo size may be no greater than 88x33 pixels.  For more information about eBay's listing policies visit http://pages.ebay.com/help/community/png-list.html

  • Thumbnail Link Input Areas  These input areas function the same as Website Link Input Areas (above) except Thumbnail Links can be configured to flow up next to each other within the body of a description and Thumbnails always require an image (on which the auction visitor is to click).  Thumbnail links provide an adequate solution for members determined to include in their descriptions a gallery of pictures in click to enlarge format.  Using Thumbnail Link Input Areas for galleries, however, is very labor intensive and recommended only for items that will be listed over and over again or for high value items worth the extra effort.

  • Email Link Input Areas  HTML links may be constructed to open a visitor's emailing program and start a blank email with your email address already filled in as the "send to".  Email Link Input Areas enable you to include such links within your auction description and optionally also to prefill the subject line of emails with the eBay auction number from which it was clicked.  Email links enable visitors to contact you directly instead of needing to go through eBay's contact seller mechanisms.  These can be a good or bad depending on your need for privacy.

  • My Other Auctions Link Input Areas  This input area enables you to easily create a link to your other eBay auctions or to any other web page on which your auctions are listed (such as a third party gallery page).  Generally I recommend use of such a link instead of embedding auction galleries into individual auction descriptions.

  • Terms and Conditions Input Areas  If you desire a section of your auction description dedicated to defining your terms and conditions of sale (policies, etc.) then this is a good way to separate that section from the rest of your auction description.

  • Code Input Areas  Code areas are for advanced users who desire to include JavaScript and/or substantial blocks of HTML (such as shipping calculators) within descriptions.  Code areas are not processed by FreeForm -- whatever is put into them is passed "as is" straight through to Preview and to the HTML results generated by FreeForm.
Preview
Behind the scenes FreeForm converts information from Input Areas into error free, optimized for eBay, HTML "code".  HTML "code" is best thought of as instructions that are read and interpreted by an Internet browser (such as Microsoft Internet Explorer) for presentation within a web page.  In FreeForm's Preview you are shown the same presentation as will ultimately appear on eBay when the HMTL "code" has become a part of an eBay auction web page.  It is the underlying HTML "source" code (not the presentation itself) that you will need to paste into the description field of an eBay auction listing form.  That code is provided when you click on one of the "Post Auction" methods at the bottom of FreeForm's Preview page.


What is HTML?   To help you understand the difference between a presentation and the underlying "source" code you may perform a technique that all webmasters know about.  Right click once within the body of a web page (except on a picture) and then left click once on "View Source" within the little popup menu.  That will bring up a window showing the HTML code that was used to create the presentation of the web page you are looking at (you can do that with this page now).  Looks like a bunch of gobbly gook to the untrained eye but browsers understand it!  This is the kind of stuff FreeForm creates for you but you don't need to right click on the Preview page to get it.  Instead, it is made available in either of the "Post Auction" methods from the program links at the bottom of FreeForm's Preview page.

The World Wide Web is often so well connected that it can be confusing where you are.  FreeForm is not a part of or connected to eBay.  The only connection to eBay that occurs is when you use FreeForm to open up eBay in a split screen or another window of your browser so you can transfer auction description HTML "code" into an eBay form.  Up until you've transferred information from FreeForm into an eBay form what is entered into FreeForm is not communicated to eBay in any way.  This means you can feel free to experiment designing auction descriptions using FreeForm without fear of accidentally publishing an auction.  What this also means is that although FreeForm provides the ability to save up to twenty different auction descriptions, what is saved has no connection to eBay.  As a result, you can not edit the descriptions saved using FreeForm and expect the changes made to be reflected in already posted eBay auctions.  To change an actual eBay auction requires you to revise it on eBay.  Conversely, revising an auction on eBay will not change what has been saved with FreeForm.

System Requirements
FreeForm runs through your Internet browser over your Internet connection.  There is nothing to download and nothing to install to use FreeForm.  That simplifies things tremendously because the only requirements are of your browser, Internet connection, and indirectly, the state of your computer's memory:
  • JavaScript (a programming language used by browsers) must be enabled in your browser.  If, when you place your mouse pointer over the red box below it changes to blue and when you move your mouse pointer off it changes back to red then the browser you are using has the necessary JavaScript capabilities required and enabled.  By default the browsers that support JavaScript will have it enabled so it will have required some sort of setting changes by you or someone else who uses your computer to disable it.
    JavaScript test: 

  • Your browser and operating system must be capable of having more than one browser window open at a time and be able to open such windows promptly.  Older versions of AOL, for example, have a problem opening new browser windows and return errors such as "Caller rejected by Callee" which really means that the AOL system took too long to open the window.  Most AOL users will not experience this when using newer versions of AOL and, in any case, running Microsoft Internet Explorer (version 4 or higher) or Netscape (version 4x or 6.2+) instead of AOL's browser (after you have logged on to AOL) will completely avoid the issue.  WebTV users will, unfortunately, not be able to use FreeForm because only one "viewing window" at a time is supported by that system.

    Hot Tip for AOL Members: The Internet browser built into AOL may interfere with the normal functionality of websites including FreeForm programming.  You can easily avoid such issues by using Internet Explorer instead for Internet browsing.  After logging into AOL minimize AOL and launch Internet Explorer on your desktop or in your Start Menu and navigate to the websites you want to visit via Internet Explorer.  Internet Explorer also includes a place to save your "Favorites" so you won't always need to type in Internet addresses.  Besides improved function, by using Internet Explorer you gain the capability of adjusting your viewing window to a much larger size than is capable within AOL.

  • Because FreeForm is an online program it may not be suitable for some people using relatively slow or problematic dial up Internet connections.  FreeForm passes a lot of information from page to page which, naturally, effects page loading speed.  The only way to know for sure if you can live with that is to give it a try.

  • FreeForm requires more "horsepower" from your computer and Internet browser than simple web page viewing.  For that reason it is recommended, before launching your browser, that you close unneccesary applications/programs running on your computer.  Closing other programs releases memory that can instead be used by your browser.

  • Not required, but cookies will help avoid needing to type in your member ID and password when saving and restoring description templates.  If cookies are enabled you will see "cookies are enabled" in the text box below (this test requires JavaScript and will have been performed at the same time as the color test above).  Cookies are typically enabled by default in browsers so it will have required you or someone else using your computer to have disabled them.

Picture Hosting Requirements   Table of Contents
FreeForm provides "Picture Input Areas" that make it easy to display an unlimited number of pictures within the body of your auction descriptions.  You may, instead, create descriptions without pictures (don't use Picture Input Areas) and select eBay Picture Hosting during the auction posting process.  Using eBay Picture Hosting, however, reduces your freedom of expression:  With eBay you can only choose up to 6 pictures, you have no control over where your pictures will appear in your auction, no control over the quality of the pictures (eBay performs automatic adjustments), and if you need more than 1 picture to properly present your item for sale then eBay charges extra fees.

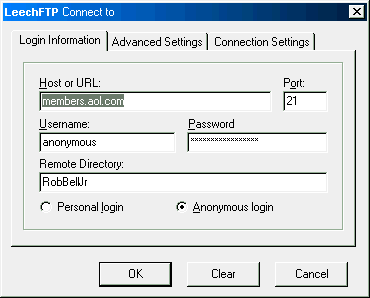
The only alternative to using eBay Picture Hosting is to display pictures within the body of your descriptions and the only way to achieve that is to find a place on the Internet (other than eBay) to store your pictures.  Unfortunately, there is no way to show pictures directly from your home computer!  Following is a discussion of what what you need to know in order to select and use a suitable picture/image host to enable display of pictures within an eBay description.

What is Image/Picture Hosting? Table of Contents
All pictures/photos/images that you use in auctions must first be copied to a server on the Internet.  When you choose to use eBay's picture hosting service "iPix", for example, eBay is taking copies of your pictures from you (uploading them) and storing them on their servers.  The process is super simple because eBay takes care of everything from the time you "show" eBay which pictures to use on your computer on through to the display of those pictures at the bottom of your auctions.  If you don't want to use iPix because you don't like the way pictures are altered by eBay, or you want pictures to be displayed up inside the description area of your auctions, or you need lots of pictures with your auctions and don't want to pay eBay for them, then you'll need to do some of the work eBay's iPix is doing for you behind the scenes -- You'll need to rent a little place on the internet for yourself.  You'll do best if you first have a basic understanding of how hosting on the Internet works:

The World Wide Web (aka Internet) consists of a huge number of computers all physically connected together either via phone lines or direct cables.  Most of those computers are what are called "servers" because they are designed to serve up files (web pages, pictures, etc.) that are stored on them.  Servers can be owned outright or space to store files on servers can be rented (website or image hosting service) and there are even services that provide "free" hosting.  What you see when you access websites such as eBay.com and robshelp.com is what is stored on servers.  To access servers on the Internet requires an ISP (Internet Service Provider) to provide a connection (gateway) to those servers.  If you pay monthly service charges for access to the internet, this gateway is what you are mostly paying for.  Some ISPs, however, do also supply server space that can be used to store web pages and images. 

To view files on servers a "client" such as an Internet "browser" is required.  Right now you are using a browser to view this page (for most that will be either AOL, Microsoft Internet Explorer, or Netscape).  Whichever browser you are using, it is a program stored on your own computer that handles communication with servers.  Browsers act as intermediaries doing most of their work behind the scenes requesting data from servers, filtering it, and finally presenting it on your computer screen.  Part of the filtering that browsers do is interprete HTML (Hyper Text Markup Language).  HTML instructions (tags) are embedded into files stored on servers that instruct browsers what to display and how to display it.  The "what to display" may be pictures (images) that are stored on different servers and this is exactly the case when auctions are viewed on eBay.  The images in an auction on eBay are actually stored on other servers.  You only see them because HTML in the auction page has instructed your browser to take a side trip to another server to get the image files and display them.  FreeForm, among other things, automatically provides the HTML instructions that allows pictures to be seen once they are on eBay but you need to provide the addresses where your pictures are stored.  Those addresses are called Universal Resource Locators (URLs).

Picture URLs and Uploading Table of Contents
To be able to include images within auction descriptions on eBay the images must first be made available somewhere on the internet.  This requires an internet host (a place on the internet to store the images) and a process of uploading (copying from your computer) your images to that host.  Once an image has been uploaded to an internet host it arrives at an address referred to as a "URL" which consists of the path to the image and the file name assigned to it.  This URL is what is needed by FreeForm and/or eBay forms to enable pictures to be displayed. 

URLs always begin with "http://" and are case sensitive.  Case sensitive means that when a URL is typed, the capitalization of each letter must match exactly the capitalization used for the file name on the server.  FreeForm has built in correction mechanisms for several problems with image URLs on eBay.  Particularly, some browsers have problems with special characters, blank spaces, and slashes pointed the wrong way.  FreeForm will fix the slashes and perform what is called URL encoding that converts blank spaces and special characters into what all browsers can read.  When moving from the Builder form to Preview and then back to Builder you may see the result of the encoding (percent signs and such in the URL).  This is a good thing!  but please advise if any problems are encountered.

Inaccurate typing of URLs is the most common cause of errors when including images in auctions.  For that reason it is suggested that you become adept with the Copy and Paste functions provided by the Windows operating system.

FreeForm supports a point and click interface to almost any service (Internet server) that generates what are called directory indexes (file listings).  People who use AOL and EarthLink as their ISP are provided with such webspace as part of their membership.

Regardless of where you decide to store your images on the internet, you will need to copy them from your home computer to the internet server.  After being transferred they arrive at an internet address or URL (discussed above) that you refer to in order to display them.  The copy process is called uploading and can occur via a browser interface, via email attachments, or via programs that specialize in transfer of files called FTP (File Transfer Protocol) clients.  Typically, maintenance of files stored on image hosting services is done through a browser interface meaning you visit their site, log in, and then are given the capability to add, rename, or delete files.  General use web sites typically require the use of FTP.  FTP is the more powerful of the file maintenance/upload methods and for heavy use is the most efficient, but it is also more complicated as you first need to install an FTP program on your computer and then learn how to log in to your host through the program.  To give you a general idea, a couple of example screen shots are shown below.

Browser Upload Animation (Stas.net)

FTP Settings - LeechFTP
http://linux.fh-heilbronn.de/~debis/leechftp/


Upload using FTP

There are also services that offer temporary image hosting.  With these services a browser method for uploading image files is provided and the images are only stored for a limited time (typically well beyond the "life" of an auction posting).  Usually uploading is performed only one picture at a time but the method is very straight forward so is good for beginners.

Temporary Image Hosting Upload Animation

TIP:  In the animation above you see an example of a URL assigned by an image hosting service after uploading has occurred.  The process of uploading many pictures will, of course, result in many URLs.  A good way to keep track of them is to open a word processor, such as Notepad, in another window of your computer and use the cut and paste method to produce a list along with a description to help you remember which is which.  Then, when it is time to fill the URLs into FreeForm open the word processor document and copy paste the URLs into FreeForm.  No typos! 

updated nightly Because I've seen how people struggle with image preparation, image hosting, and URLs I've started my own image hosting service.  It's not free but EAPH.com Easy Auction Picture Hosting works hand in hand with FreeForm and, just like FreeForm, is designed based on the insight gained while answering many requests for help.  EAPH.com is both the easiest to use and most flexible image / picture hosting service you will find providing virtually foolproof storage for auction pictures.  When using EAPH with FreeForm you will not need to type in or even use copy and paste to include pictures in your auctions -- it's all point and click.  Although prepping images (discussed below) is a good thing to do before uploading it is not required with EAPH -- an easy to use tool is included with the hosting service.


Copy and Paste Table of Contents
Because it is so easy to make transposition errors with URLs and because copy and paste skills are great time savers, a short animation has been prepared to demonstrate one convenient technique.  In the animation, the little red flashes represent Left mouse button releases while the little blue flashes show Right mouse button releases:

Copy and Paste Animation (instructions are written out below the animation)

To copy, point the mouse at one end of the text then press and hold down the Left mouse button while dragging the mouse pointer across the text.  When the mouse pointer has reached the end of the text release the Left mouse button (this is the process of "highlighting").  Then press and immediately release the Right mouse button (one click) - this will pop up a little menu.  Point the mouse at Copy and click the Left mouse button once.  The text is now copied into a hidden place called the "clipboard".  The clipboard will retain whatever is copied into it until something else is copied over it (or until the computer is turned off).  The standard Windows clipboard can only hold one thing at a time.

To paste from the clipboard, place the mouse pointer into a location that will accept textual content (any place you can type).  Then press and immediately release the Right mouse button (one click) - this will pop up a little menu.  Point the mouse at Paste and click the Left mouse button once.  The text from the clipboard will then be "added" to the text area.  In the recording above, it was desired to replace what was already in the text area instead of adding to it, so what was already present was highlighted first.  Then, when pasting occurred the original content was replaced by what was in the clipboard.

Prepping Images for use within the body of descriptions on eBay Table of Contents
There are many opinions on what is the best size for pictures used in auctions.  The bottom line is that there is no absolute size you should aim for.  What is really best is to produce the smallest physical dimension and smallest file size images you can get away with nearly regardless of how small they become.  What you can "get away with" is a matter of judgement depending entirely on what is being sold.  For example, it will probably be necessary to display larger and more finely detailed pictures when selling artwork and jewelry than for computer equipment and garden tools.  With that in mind, here are some quidelines and techniques that can be employed when preparing images:

  • Set your digital capturing device (scanner or camera) to its lowest resolution setting.  The smaller your images start out the less you will need to resize them which can contribute to distortion.

  • Crop away the excess.  Most photographs contain alot of unnecessary "landscape" surrounding the subject.  Use a graphics utility or photo editing program to crop away everything but the subject itself.  Usually this will produce significantly smaller dimensions.

  • The amount of effort put into prepping pictures for auctions depends on the what you are selling and/or how difficult it was to obtain good photos.  If it will be a problem to reproduce them always save the original picture in a safe place and work from a copy.  It is easy to make mistakes when working with photos and you do not want to ruin the original!  Furthermore, for a special effort it is a good idea to employ what is called "incremental saving" of your images.  Incremental saving allows you the luxury of backing up a step in case you goof up.  Stop every once in a while and save the image with a file name to which you add a number, ie.  necklace1.bmp, necklace2.bmp, etc...  For those hard to reproduce pictures be sure also to use the bmp file type to save incrementally even though the final result will be either gif or jpg.  BMP is a "non-destructive" format (will be discussed below).


Incremental Saving as BMP

  • Aim for final physical dimensions that are at least smaller than 560 pixels wide by 420 pixels high.  These dimensions will fit within the viewing area of almost every internet browser and so avoids the sometimes annoying necessity for viewers to scroll their windows to see all of the picture.  To achieve smaller dimensions employ the resizing feature available with photo editing programs.  When using such programs look for and check that pictures will be resized proportionately then adjust either the width or height and the other dimension will be adjusted automatically.  Finding the right size is a matter of trial and error.  Remember that the goal is to produce the smallest size you can "get away with" before the picture loses important detail so start by setting the width to 400 or the height to 400 but in no case should you actually increase the size.

Proportionate Reduction

  • Very large images can result when fine detail is required.  An alternative is to create two images.  One to display the entire subject in less detail and another that shows a smaller portion of the subject in fine detail.  To split off a portion of the picture use the cropping feature of a graphics utility program to remove all but the small portion you want to feature and save that portion as a separate image.

  • The last step in preparing your images is to save them in jpg or gif format.  Use gif format for pictures that include line art or text that must be legible.  For example, gif images were used on this page because they contain text that was important for you to read.  For every other type of picture you should use the jpg format.  JPG produces the smallest file sized images ideal for use on the internet and in auctions because they load more quickly.  JPG, however, is what is called a destructive or lossy format meaning that as a trade off for smaller file sizes (compression) the quality is reduced (gif is lossy also to the extent that the gif format only allows up to 256 colors).  Fortunately, most pictures can be significantly compressed before the human eye will detect a difference and even more compressed before the picture loses enough quality to become unacceptable.  Fortunately also, you can control the percentage of compression that is applied and through trial and error arrive at the best compromise between file size and quality.

    Important:  Don't resize or compress your photos if your hosting service also applies automatic resizing or compression when you upload them!  Double resizing and/or double compressing may cause unacceptable distortion.

    Note:  If you have a choice don't use a host that automatically adjusts your photos.  The quality of your photos can make all the difference between getting bids and not getting bids on your items for sale -- it is best for you to remain in complete control over their quality.

    Saving as jpg at various compressions

  • Compression is applied to a jpg file as the file is saved which means several versions of the same picture need to be saved to test the results of various levels of compression.  To accomplish this, first choose to save the picture in jpg format and look for an options button of some kind.  "Behind" that button you will likely find the ability to set the degree of compression to be applied (sometimes the scale is expressed as degrees of quality instead of degrees of compression).  Choose different settings as you save files using different names for the files to help you remember what settings were chosen for each.  For example, name one file "necklace20" and another "necklace50" to reflect the percentage of compression applied.  Note that some graphics editors will not display the result of the compression during the process of saving so be sure to load the versions separately to perform visual comparisons.  When performing the visual comparisons, as silly as it sounds, the one you should choose to use in your auctions is the one that is the worst looking without actually looking bad because that one will be the smallest you can "get away with".  It is a bit of a chore at first but with practice you'll be running through the steps very quickly and not only will your potential bidders appreciate a faster loading auction page, you will save uploading time using the smaller images you now know how to produce.
There will be times when a photo that is reduced and compressed to meet the practical needs of eBay and the Internet will less than adequately represent the quality of the item being sold.  Before giving up and forcing visitors to wait for excessively large photos to load in your auctions, try a "cutaway" technique.  Basically that is taking a smaller representative sample (crop) from the overall view and leaving that in its original size to serve as a closeup.  Here is a tutorial that demonstrates the technique and touches on cropping, resizing, and compressing photos:

Crop - Cutaway - Resize - Compress Tutorial

In Conclusion Table of Contents
If you've made it this far, congratulations!  Knowledge is power.  Understanding the basics will help give you the power to present your items a cut above the average seller.  This extra effort can do nothing but translate into a better bid to visit ratio for your auctions.  Time spent learning to use FreeForm is an investment that may very well last the entire life of your online selling efforts, and FreeForm is the easiest way to create and save custom auction layouts for use over and over again.

Although I am unable to answer emails as quickly as I'd like, I do always answer them and usually within 24 hours.  Please feel free to write with questions, suggestions, and even criticisms.

Good Luck with your auctions! 
Rob Bell
rob@robshelp.com


If you've reached this page from within the FreeForm program you may close this window to return.  If you arrived here from elsewhere then you will always be able to find FreeForm from the home page at robshelp.com